How to setup a Hivemind Dev Environment

---
#### Preface
This tutorial assumes that you have a server with hived installed and synced. As well as a server capable of running [Hivemind](https://gitlab.syncad.com/hive/hivemind). (preferably Ubuntu 20.04)
If you would like to run a production environment Hivemind, please run a docker container. It is a lot easier to set up and the potential of something going wrong is a lot less than manual setup. (Also recommended)
#### Getting Started
First of all, you would need to install PostgreSQL 12, since that is what we're using for Hivemind at the moment, as well as the main requirements for Hivemind.
`apt install postgresql git python3 python3-dev build-essential libpq-dev libxml2-dev libxslt1-dev libldap2-dev libsasl2-dev libffi-dev`
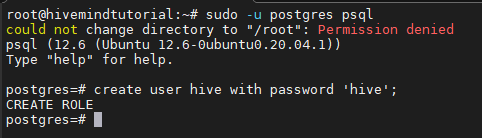
After the installation is complete, you will need to go into postgres. (This is similar to MySQL -uroot)
`sudo -u postgres psql`
then, create the database user.
`create user hive with password 'hive';`
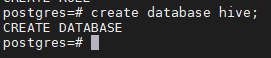
Next step, create the database.
`create database hive;`
By default, a database is owned by user `postgres` you will need to change this to the user that you will be using for your Hivemind instance, so in this case, `hive`.
`alter database hive owner to hive;`

Next, you will need to set up an intarray extension in the database `hive`.
`\c hive`
`create extension intarray;`
Type `\q` to exit postgres and return to terminal.
The next step is to clone the repository for Hivemind.
Use `git clone https://gitlab.syncad.com/hive/hivemind.git`
Next, `cd` into the hivemind directory and installing prerequisites. (if you'd like to run tests)
`cd hivemind`
`git submodule update --init --recursive`
Next step is to start building and installing hivemind.
`python3 setup.py build`
`python3 setup.py install`

After the build has been successfully completed, export the database information and node information.
`export DATABASE_URL=postgresql://hive:hive@localhost:5432/hive` (hive:hive is user:password).
`export STEEMD_URL='{"default":"http://apinode:8091"}'`
After everything is set up, you can run Hivemind with `hive sync`.
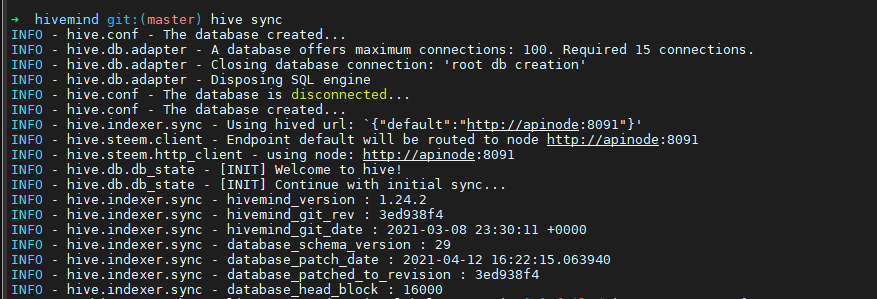
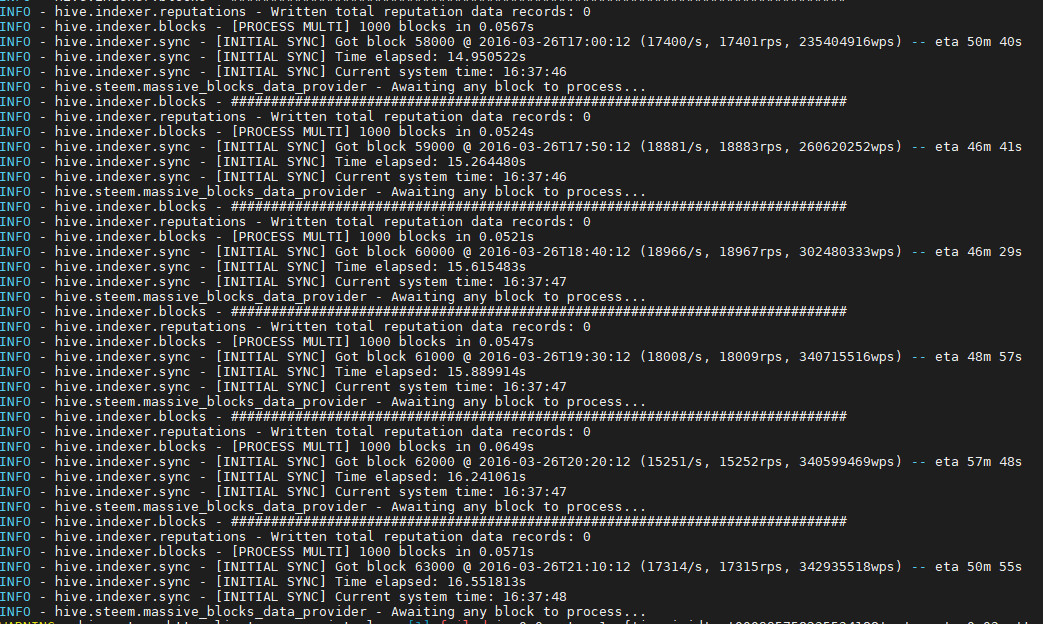
If your set up was correct and your node is a private, preferably local node, your hivemind instance will start syncing. Just so you know the syncing process can take several days.
To start the server (for incoming calls) you can use `hive server`.
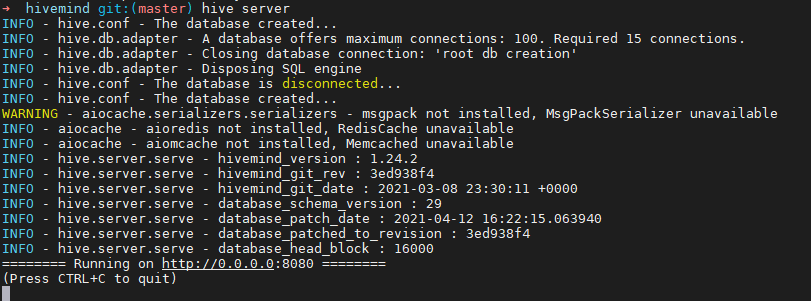
As this is a test instance, it is not fully synced. So a fully synced hivemind will look different, especially *database_head_block* :)
#### The End
Please don't forget that this is not recommended for use in production environments, please use Docker in that scenario.
Also, if this helped you and you have an extra witness vote, I'd like to remind you that I am a witness! You are more than welcome to vote for my witness [here](https://peakd.com/me/witnesses).